by Greg Gilardi
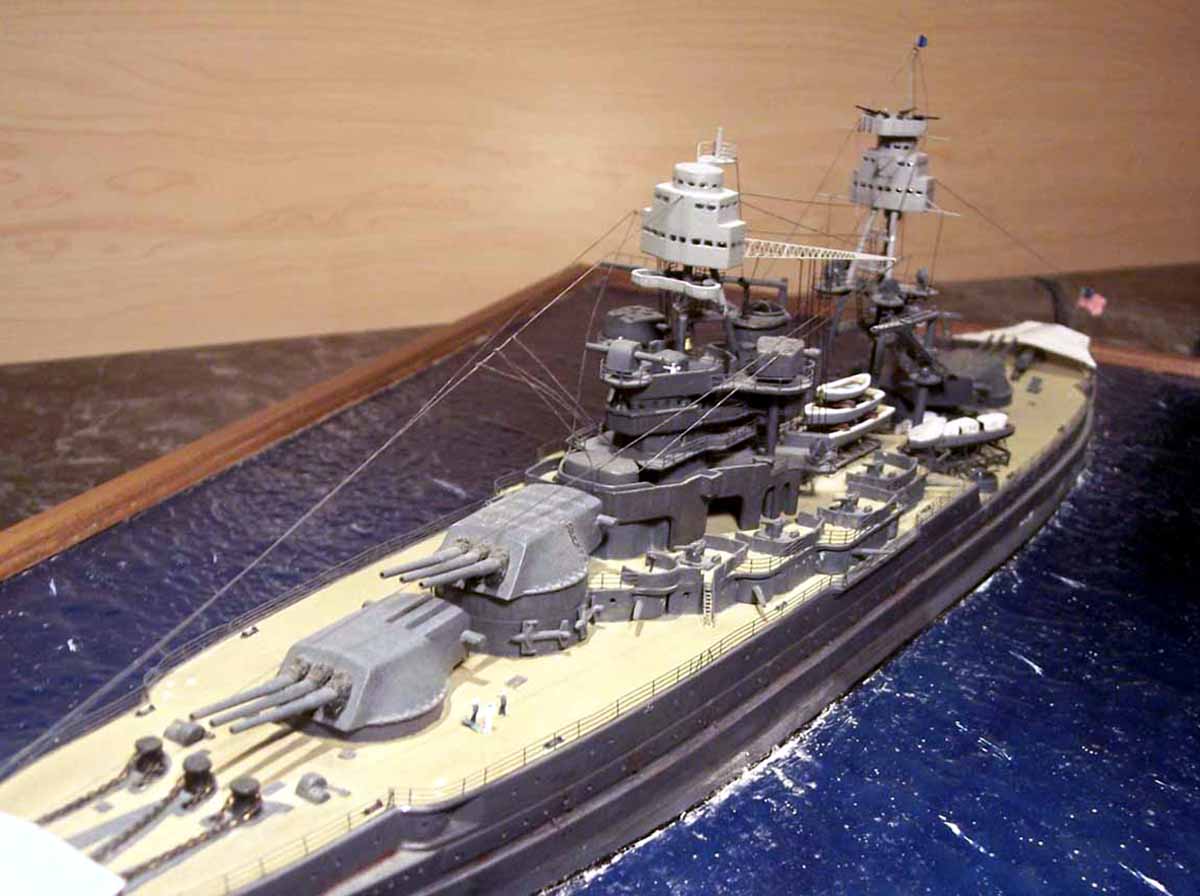
1/350 USS Arizona BB-39 (Trumpeter)
I've been building models since I was a kid. As the years went by they became fewer and farther between. Then I got married, had a couple kids and the years just seemed to fly by. I never thought I would ever have the time to pick up the hobby again. That was until I saw the Banner Models 1/350th USS Arizona in a local hobby shop window. It instantly brought me back to when I built the Revell 1/426 version. I built no less than three of those very kits as a kid. . . . . and still have two of them. I had always wanted to build a larger scale Arizona. Needless to say I ran right in the store and had the sales girl pull it out of the store window display. Once I got it home I gave it a good look over and that's all it took. I was hooked again. I immediately went online and started searching for what I could do to make it better. That's when I discovered ModelWarships.com. Since then I have been a regular visitor and with the information I have found have been building better and better models. This will be the first of hopefully many kits of mine to make it onto your website. Thank you for all that you do.
As I said, I started out with the 1/350th Banner (now Trumpeter) USS Arizona. I decided to do a diorama because I like to see a ship in it's environment. I followed the basic building instructions for all the major sub-assemblies. After removing a lot of the kits molded-on details I proceeded to fabricate my own and/or install photo etched replacements (A first for me). This included the secondary gun tubs, the observation platforms, the platform and mount for the future radar, access hatches, anchor chains, cranes, boat boom & ladders, stack, etc. I also drilled out the main gun barrels and all the portholes and detailed the ships boats. The "glass" windows were made by simply placing a drop of Testors clear plastic cement in the holes provided in the kit. I painted several dozen PE crew members and placed them around the ship. The Kingfisher float plane was made by using various parts from several 1/350 Trumpeter aircraft also detailed with PE. The small craft cruising past Arizona was made out of scrap bits and pieces. The flags were made on my computer and glued over foil to "pose" them as if being blown by a stiff sea breeze. The "canvas" bow and stern sunshades were made by soaking tissue paper in white glue thinned with water. I made a basic frame out of plastic stock then laid the wet tissue over it. Once dried, I weathered them along with the rest of the ship using washes, dry brushing, & chalk dust. The ship was painted using various shades of Tamiya acrylics. Larger sections were airbrushed while smaller areas and details were done by brush. Monofilament fishing line was used for all the rigging.The base for the scene was created using picture frame molding glued to a piece of plywood. I spread liquid latex on top of the plywood to create the texture of waves. Once it dried I painted it several shades of blue. After the paint had dried I then spread a thin layer of gloss Mod Podge over the entire surface. This gave the "ocean" its shine and the Mod Podge dries transparent so it gives some depth and helps it to settle around the ship.
There were a lot of firsts for me while building this model. My first diorama, first time getting into so much detail, first time making a "water" scene, first time scratch building/modifying kit parts, first time referencing what I was building, first time photographing my model, and first time using photo etched parts, which, although difficult at times, was the most satisfying of them all. The kit took me about a year off and on to complete. Always looking for more reference material. Since finishing it I took some time to build a hobby room for my wife and I complete with three display cases, two pull out wall units, and nearly fifty square feet of counter space. She does her scrap-booking and I work on my models. Side by side.
Photoetch: Gold Metal, White Ensign, Eduard
References:
