
This article provide a brief description of my build of the 1:400 scale Aurora. This particular kit was purchased through Naval Base Hobbies and is from a Russian (or possibly Ukrainian) manufacturer (Webmaster's Note: This kit was originally a Heller mold, which must have been sold to a Russian company). This kit as been assembled out of the box and using the coloring scheme of the Aurora circa 1917, which is how she is currently displayed as a museum in St. Petersburg.
The individual pieces require some cleaning of the flash but otherwise the fit of the parts and the molded details are acceptable. Acceptable that is except for the gun splinter shields. The interior of the gun mounts are rather primitive looking and could be greatly improved by carving out some of the excessive gun mounting points.
Below is a quick list of the detailing activities:
- Removed all of the molded ladders and replaced with photoetch ladders. Added a few extra ladders to the masts, mid gun deck, fore and aft hull, and locations at the back of the bridge structure.
- Elected not to install the catwalk, which snakes its way from the back of the bridge structure to the mid-ship gun deck. The installation of the catwalk did not appear to add much value to the ship; it looked rather bulky and would have required a mountain of railings to make it look acceptable.
- Except for the canvas covered railing on the second level of the bridge, I trimmed away all of the molded railings and replaced them with photoetch rails. Of all of the little detail improvements made, replacing the molded railings undoubtedly has the greatest impact and provides the greatest satisfaction. Well worth the effort and time.
- Drilled out the portholes one afternoon while watching football. I used a little finger drill, but I would recommend using a power drill. There are a lot of portholes.
- Replaced (actually covered over) the molded ships booms with pieces carved from toothpicks.
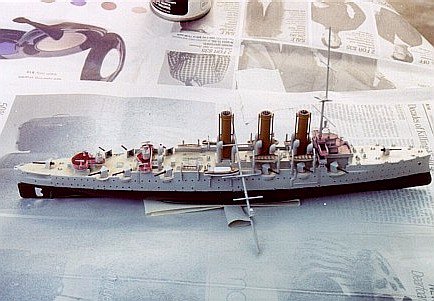 In most cases the excess material will not be a problem (in fact it helps to bring out detail). However, in the final stages I applied white pin stripe as a boot and found that the portholes needed to be trimmed before the pin stripe would lay flat.
 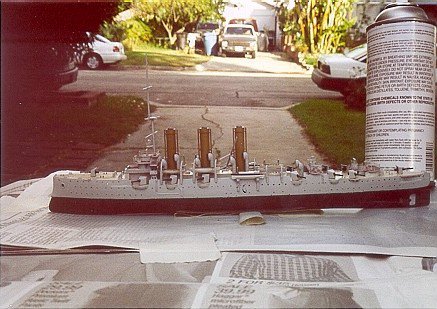 I realized my error after painting. Both pictures do show the general color scheme. Green lower hull, light gray upper hull and structures, red throated vents and buff stacks. I have been using Testors Afrika Mustard for buff and find the results quite acceptable, as it seems to have the right flavor.
Figure 3 shows the building board and the wooden dowels that will be used as the permanent mounting posts. These are nothing more that turned wood dowels purchased at a local hardware store, literally cost pennies apiece. 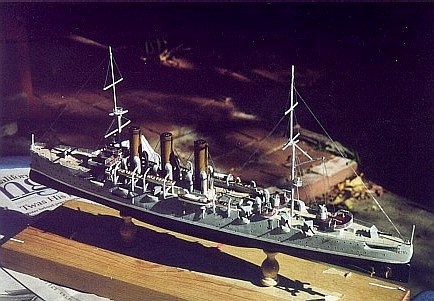 Once they are stained and varnished I think they look rather nice. I used white glue to install them into the hull of the ship. White glue holds well enough for this application and if I should want to remove the posts at a later date, the white glue bond is easy to break and to clean up.
The davits and ships boats have been installed, and the masts partially assembled. It is also just barely possible to see the interior of the splinter shields and discern the places where improvements can be made. I have also taken the liberty of coloring some of the decks a dark red. This coloring scheme was copied from the WEM coloring chart for their 1:700 scale Askold and, therefore, should not be seriously taken for an early 20th century Aurora.
Figure 4 shows the ship close to its final configuration. All rigging is in place, the fore and aft main deck railings are installed, the boot is applied and the weathering complete. 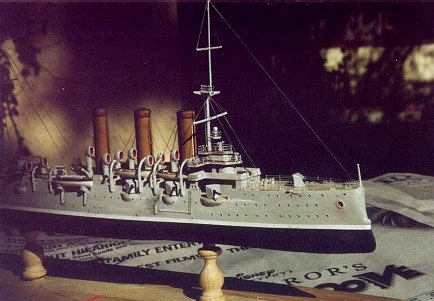 Watercolors have been used to help bring out the lines around the individual pieces with some black chalk applied to simulate coal dust on the hull and smoke residue on the stacks and a bit of red for rust on the bow. I have also experimented with using a white chalk stick to apply some highlights to the hull, bridge structures, splinter shields, davits and a little on the green portion of the hull. It seems to work.
A quick remark about rigging: I intentionally used very little color on the fishing line. I was attempting to have the rigging portrayed as more of a "suggestion" rather than as a part of the model that caught the viewer's attention. The rigging is the same light gray as the ship and therefore, it seems to blend into the background. I think that black rigging would have been too powerful for a model of this scale.
Pictures 5 through 7 below are of the finished product mounted on a scrap of pine. Note how the inexpensive wooden standoffs have accepted the stain and the finish. If I were building a $300 resin showpiece I would not spare the expense for quality brass standoffs but, for a $10 Aurora, stained wood looks just fine.
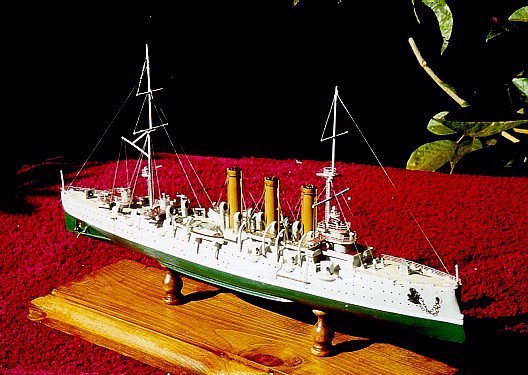
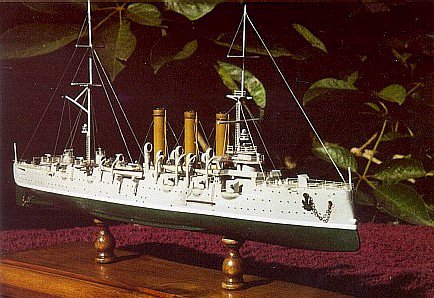
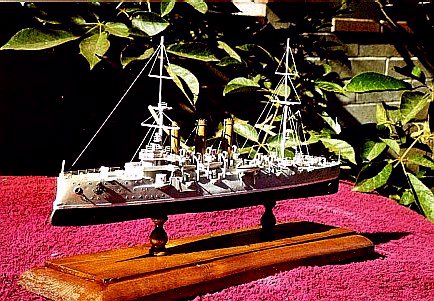
Since the pictures were taken the anchor chains have been removed for use on a Zhengdefu cruiser. When I locate some suitable, finer junk jewelry chain, I'll reinstall the anchors.
On the 1 to 10 scale I would give the kit a 5 for quality, an 8 for ease of build (if it is built strictly from the box) and a 4 for historical accuracy. On the fun and satisfaction scale I would give it an 8.
Return to Articles Page