Building the Tamiya U.S.S. Missouri
By Tom Van Dermark
|
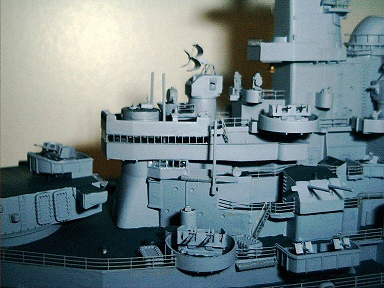
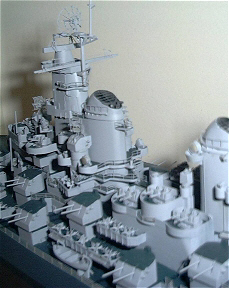
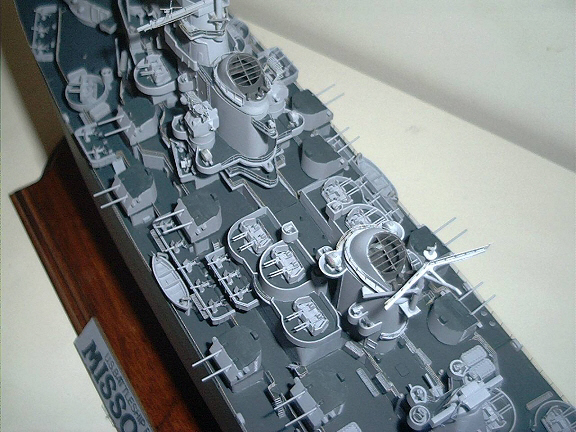
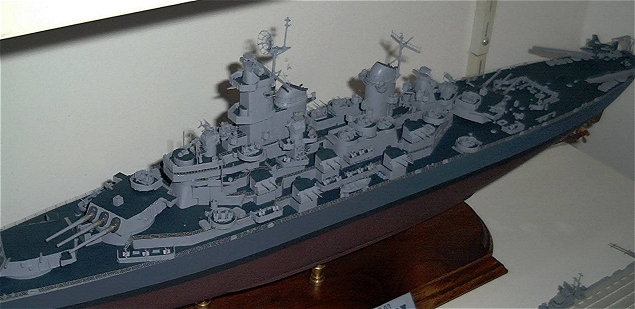
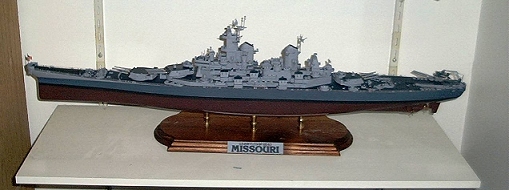
Everyone knows at least a little about the history of the U.S.S. Missouri so I will not spend any time dwelling about that so let’s just get into the building of this historic ship. For the build I am using the Tamiya 1/350th offering, along with the Gold Medal detail set along with the same company’s 20mm and 40mm detail set and last but not least the floater net set. Do not get me wrong if you use these three sets it will involve a lot of work but the results are well worth it. I decided to portray her as she appeared in 1945 in measure 22 camouflage after reporting to duty in the Pacific theater, but before the Japanese surrender in which her decks where holystoned until the natural wood color came through. Measure 22 camouflage consisted of Navy Blue from the waterline to an imaginary parallel line from the sheer deck forward, Haze gray above that line and all vertical surfaces, and weather deck blue on all horizontal decks. Construction started with the 1 piece hull where I started off by measuring and drilling four holes for the supports I am using with the display base. These are nothing more then lampshade ferules that where drilled and tapped for Ľ x 28 bolts. I then replaced the plastic outer propeller shafts with metal rod along with strengthening the rudders. I strengthened the rudders because it never fails that somehow or another I always end up breaking them off. So I removed the tabs on the rudder and drilled a hole in both rudders and installed some more metal rods, drilling as far down as I could and then drilled the same size hole in the hull and super glued them into place, this also allows you to glue the rudders in any position you want. I had heard that the fit of the 3 piece deck was pretty bad so while dry fitting these I noticed that if I removed the tabs on the forward deck it would allow me to close the gap to a more acceptable size, plus the mount for the 2 20mm guns on the bow hid the majority of the gap that was left. Before Gluing the forward deck on I hollowed out the where the anchor chains disappear into the hull with a variable speed dremel tool, and the molded on chains where replaced with scale chain. Next came the 16-inch gun turrets which went pretty much according to the directions with the exception of adding the floater net holders on the rear of each turret and stretched sprue for the reinforcing braces for each. Next came the bridge assembly. The molded on bridge windows where replaced with the photoetch version once again using the dremel tool. I will replicate the windows later by using Elmer’s washable school gel. Construction of the bridge assembly once again went according to the directions but I also added the railings and floater nets onto each deck as I was working on each deck. Preliminary painting was also done at this time. I decided when I started this project that I would try many new things on it (much to the dismay of certain members of this club, thanks for all the answers to all those questions guys), and the main thing I wanted to accomplish is the removal and replacing of the funnel grills. For the first time doing this I think it came out pretty good. |
|
|
|
|
|
|
|
|
|
|
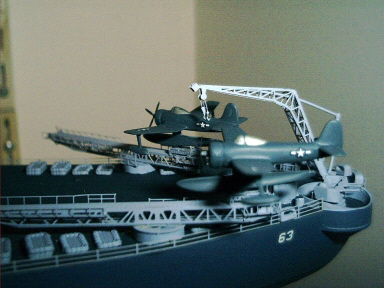
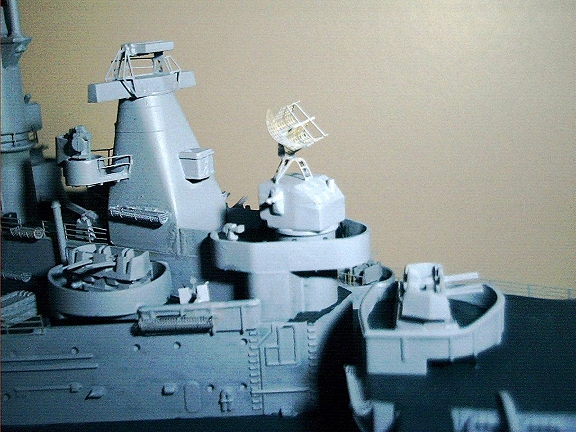
Next came what looked like the most daunting task and that was making the SK-2 radar dish. While the molded one looks o.k. pictures I have seen where it was replaced with the photoetch version definitely looked much better. Basically if you follow the directions given and I built mine up on a butter tub lid (superglue will not stick to this but make sure you clean it real well first) and the result turned out very nice. After that the MK.37 5” gun director radars where installed, along with the main and aft yardarms, I guess whoever made up the original mold for the detail set was a modeler with a lot of experience dropping things because they give you extra TBS and BK antenna’s for each yardarm trust me when I say they are small and easy to lose so be careful. The stern crane and catapult where built up next. All these where painted at this time. The last step was daunting indeed and that was to add the details for the 20mm and 40mm guns. There are twenty 40mm gun assemblies and forty-nine 20mm guns, each one has a gun sight arm support and railing attached. I found the best way to do this was to keep the 20mm guns on the sprue and work a little at a time. Leave yourself plenty of time to do these as it takes forever to do them. After that a coat of gloss coat was applied to the entire ship, decals where applied and gloss coated again and finally a dull coat was applied and the ship mounted to the base. This model is pretty long in the tooth but still is a joy to build and with a little extra time and money it can be built into quite a show piece. Once again I would like to thank those whose expertise helped me with this ship. Photos By Tom Van Dermark
|
|