by Ed Keegan
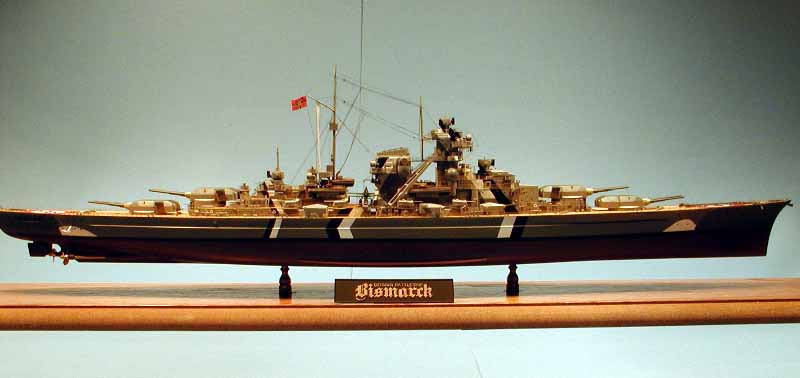
1/350 DKM Bismarck (Tamiya)
Much has been written and discussed about the Bismarck and this specific kit, so I will not go into any of the history or details here.
The Bismarck is the first of 4 WWII Battleships I intend to build. The Missouri, King George V and Yamato all remain. This is my 3rd steel navy ship built since I have made my way back into the hobby, and hopefully represents the knowledge and experience I have gained since returning. I have the sites and members devoted to this hobby to thank for almost everything I do when I model.
There were a number of things I did beyond what Tamiya supplies you with in the box. I used HO scale 1X3's for the deck, the 3 WEM PE sets and the 1 GMM PE set to enhance the model. I find I use PE from multiple kits when I build. Last time was GMM and Flagship's PE, so I try and spread my business around! My research was mainly based on Internet references, and help from several fellow modelers for accuracy. I know I should have spent some money on publications, but I don't feel I've graduated to that level of detail yet.
The hardest part, in terms of time, was the decking. That process took about 6 months. This is the second ship I have done with real wood. Warren Jones' work on his New Jersey inspired me to try the same on my 2nd model, a New Jersey that I built. Kann Gok and his Bismarck further inspired me to use lengths of lumber, rather than full strips, though I cheated and used 20 mm lengths instead of the 10 mm lengths Kann used. I like the effect so much I will continue to use it when I can on future projects. The only thing I would change is where I decided to put the butt ends in relationship to each other. The pattern should be more uniform across the deck rather than angled across.
I attempted to scratch build some items around the conning tower and some other areas but I don't think I did as good a job as I would have liked on them. I will focus on better developing this skill during my next build.
Rigging was accomplished using nylon sewing thread run through a permanent ink marker. Definition of how the Bismarck was rigged was probably where a publication would have been more helpful than what I was using. I have used stretched sprue before, but unlike Jim Baumann, I do not seem to be very consistent with my pulls. The man truly is an artist.
I replaced the main gun barrels with brass rod, but I made a mistake and used 3 widths rather than two. Next project I think I will try and get barrels from Steve Nuttal. They are very nice items and would add a lot to the overall look of the model. I used play dough to create the blast bags. This is the first time I have created blast bags and I was pretty pleased with how play dough worked. It required a little attention when trying to form it around the barrel, but sealed with CA and painted they look pretty good. I used chain from Model Expo to replace the molded on anchor chains. The searchlights were drilled and painted with Testors Silver and then filled with Future.
Paint was Tamiya, with a custom mix for the hull (almost ran out of my mix, so I need to make sure I make more each time!). The other colors used were what the kit suggests, except I used Sky Grey for the superstructure. The swastikas and circles on the deck were masked and painted. I used markings and flags from Begemot's Kriegsmarine Flags and Markings sold by WEM for the ship and the planes. This scheme should represent the Bismarck as she might have been after March of 1941.
Overall it took about 10 months to complete, although I was slowed at the end when a steam launch popped off the model as I was adding the rails. I have been pretty fortunate with the small parts when building kits. I use plastic boxes of various sizes and keep a pretty clean work space, but somehow this thing popped off the ship and was never heard from again. Fortunately Tamiya sells sprues of it's kits and one arrived about 1 week after the launch went missing. I'll probably find the original piece sometime soon!
