by William Bowden
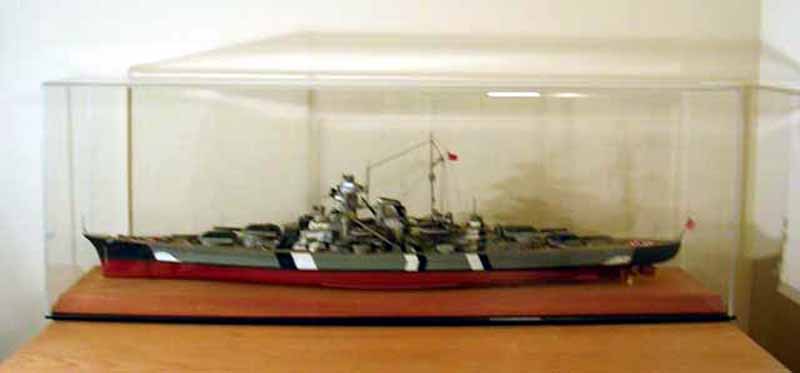
1/350 DKM Bismarck (Tamiya)
I first built Tamiya's big Bismarck back in high school, and have wanted to build another while going all out on it since then. When I saw the Tamiya kit bundled with a display board and GMM set for only $60 or so on eBay, I decided it was as good a time as any. In addition to the GMM PE set I also purchased all of the WEM Bismarck sets and the Kriegsmarine anti-aircraft gun set from our friends at WEM across the pond. Further I got some metal barrels for the main and secondary batteries, as well as the 105mm AA guns. I also found a black metal anchor chain, but in retrospect the links/inch sizing was too big so the scale is a bit off. Decals and flags came from Begemot and I also used WEM enamels for the grays and waterline stripe. The hull was painted simply using what was left of a Tamiya spray can of Dark Red. All other colors were Tamiya acrylics or enamels. Rigging was accomplished using EZ-line since I cannot work with stretched sprue to save my life. Maybe one day I'll learn how to do it (and save my life). Finally, Steve Wiper's Warship Pictorial from Classic Warships Publishing proved very helpful. Peter Beisheim's amazing scratch-built Bismarck was an invaluable resource. You can see his work for yourself here: http://www.bismarck-class.dk/shipmodels/german_models/bismarckbeisheim.html
Other information on the bismarck-class.dk site was also very useful, such as information on the different paint schemes worn by the Bismarck. I painted my model to appear as the real ship did in March 1941. However, some of the wooden decks that I have exposed on my model were NOT exposed on the actual ship during this time if I am correct. I didn't realize this until later. Oops.
The ship took 190 hours of work spread out over the course of a year because I had to take a couple long breaks while classes were in session. Numerous additions and corrections were made by myself but many inaccuracies still exist here and there. I did some heavy editing to the poor, boxy, molded-on details of the Tamiya kit and made many replacements--mainly the binoculars and a couple range-finders. There were various other scratch-built parts here and there as well. I did individual planking on the wooden decks by cutting short strips of Jammydog's super thin masking tape (I think I used .75mm width) and placing them in alignments over a base coat on the decks. Next I sprayed a slightly darker shade of paint, added more strips, then sprayed again. The results are, to me, outstanding, and someone with more skill and patience should be able to knock out a superb deck using the same technique. The decks alone took about 10-15 hours of cutting strips, laying strips, airbrushing, and then removing strips.
The model was constructed and painted in subassemblies and then put together at the end. Each subassembly was washed and dry-brushed before getting glued to the hull. I then added the railings, remaining PE, and Arado float planes. Last thing was a thin scale effect coat, flags, and clear coats. The display case is from http://www.casesforcollectibles.com/. I learned a great deal building this old kit, not only improving my modeling skills but I also gained a great appreciation for the time and research that other modelers will spend on turning an old, lumpy, inaccurate kit like this one into great works of model art.
