by Ken Hoolihan
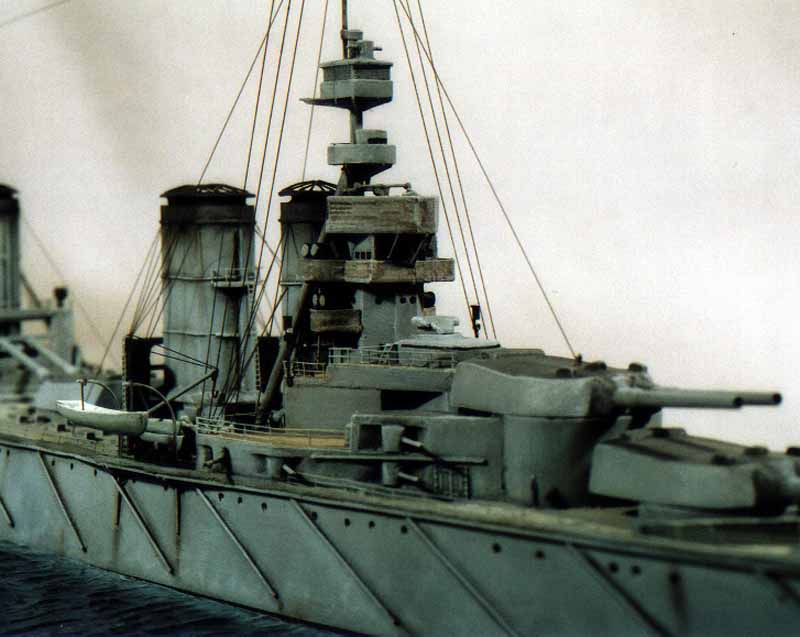
1/700 HMS Lion (May 1916)
Classic Warships kit with a lot of modifications to correct the hull shape and superstructure details etc.
1/700 HMS Lion (May 1916)
Classic Warships kit with a lot of modifications to correct the hull shape and superstructure details etc.
The Lion photos were taken with a 20 year old Canon A-1 35 mm SLR camera
and a matching Canon macro lens I bought second-hand. I use a tripod, 100ASA
Fuji film and set the camera to aperture priority with the minimum aperture
(F 22) so as to get the greatest depth of field. I also use one of those
remote shutter release thingies (I don't know the correct name for them)
so as to not bump the camera when I take the shot. For lighting I use two
50W desk halogen lights (my model bench lights) but because they put out
a yellowish light I use a blue filter to compensate. The prints have been
scanned and then manipulated in Photoshop - basically just adjusting brightness,
contrast and cropping to size.
| I am happy to share my techniques with the modelling community as I don't consider my hobby to be a competitive endeavour. Now, a blow by blow account of the seascape for the Lion reads like this; |
| 1. Fit model hull to wood base with removable wood screws countersunk
from underneath. Set this up before the model is built or painted. Plan
where the waves will be and the correct form of the ships wake considering
the vessels size, speed and hull form (see article on Steel Navy site).
2. Take the model off, wrap the hull sides and bottom in clear plastic foodwrap (NZ brandname - Gladwrap) and re-attach to wood base with screws. The idea of the foodwrap is to keep acrylic gel off your model. 3. Put on first layer of Liquitex acrylic gel medium, shaping basic ships wake pattern and any other large waves required. Let it dry, then remove model and foodwrap. 4. Sand down waves to desired shape, re-attach model with foodwrap around it again and re-apply acrylic gel, shaping crests of waves and creating textured sea surface with a suitably shaped tool to give the impression of a choppy surface if required. Be sure to fill up the gap between the ships sides and the sea - acrylic gel shrinks significantly as it dries and will create an unsightly gap around the hull, unless you keep filling it up. Let it dry, remove model etc. Repeat if necessary. 5. Paint base paint colour on gel. I used Tamiya acrylics. It doesn't matter if they are matt or gloss but matt dries faster. The first coat was a deep blue-grey mix. I never use pure blues as they are too intense and don't look realistic, especially if it is the North Atlantic or North Sea (as in the case of the Lion) you are trying to represent. 6. Next coat was a lightened version (add white) of the base blue-grey with a little deep green added as well. I thinned this down with acrylic thinners and painted strips of it parallel to the wave direction, especially concentrating on the faces of the main waves. 7. Before the blue-green has a chance to fully dry, using a brush with just thinners on it, blend in the edges of the blue-green paint to the background colour by working the edges lightly. Let it all dry thoroughly. 8. Dry-brush very lightened base colour (lots of white added) lightly over the tops of waves and around the sides of the ship, especially where the ships wake would have created breaking waves - you need to study photos to work this out for yourself. 9. Paint pure white sparingly on the bow wave and in a few other places. 10. Brush on an overall coat of Liquitex acylic gel gloss medium varnish, taking care not to get any bubbles remaining to mar your shiny sea surface. To give some "depth" to the sea you may wish to put on another coat of this varnish. It is a similar but more liquid, thinner product than the regular acrylic gel. That is how I did the Lion's seascape. I have some new ideas to make the next one better. Hope this answers your question anyway. Cheers
|

© ModelWarships.com