by Timothy Choi
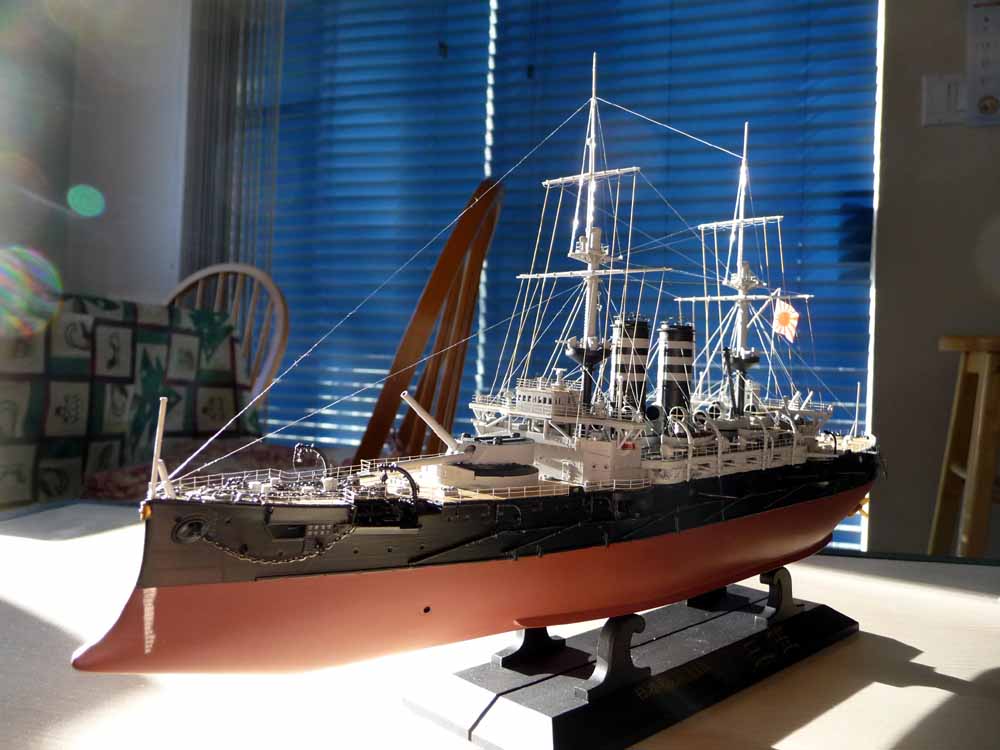
1/350 IJN Mikasa ~1902-1904 (Hasegawa)
This is Mikasa in one of her pre-war configurations. The kit used was the Battle of the Yellow Sea version, which includes the necessary parts and instructions needed to represent her in this time period. The kit included a nice booklet by the Mikasa Museum which contained a good number of photos of Mikasa in her various permutations of the black&white dress (see page 4 of the Calling All Mikasa Fans thread for more details - many thanks to DariusP for helping out with the details!).
The PE set was Lionroar's Mikasa upgrade set, which, unfortunately, was meant for the Battle of the Japan Sea kit, and thus lacked PE for some parts in this version.
Although the kit came with decals for the funnel stripes, their translucency, especially upon the black funnels and at the overlapping ends, meant that they appeared more of a cream colour than white, and thus I decided to just paint the stripes instead.
The anchor chain links were bent into a more rectangular shape using pliers, as the links were too circular. The small chains holding the anchors in place are from braided electrical wires.
The supports under the stern walkway were replaced with plastic rod.
A chart table was also added to the inside of the rear charthouse. I wish I had thought to add something to the forward bridge before putting the roof on.
The armoured conning stations had their viewing slits hollowed open.
Holes were drilled in the tips of some of the larger small calibre weapons. Port side portholes were also drilled open, whereas the starboard side ones were merely "coloured in" with pencil. The portholes and cowls on the steamboats were also drilled for some extra depth.
Rigging was a mixture of stretched sprue for the shorter runs and fly-tying monofilament (UNI Mono 4m, in lieu of UNI Caenis, which seems to be impossible to find here in Vancouver) for the longer runs. Due to the awkward ending/starting points of some runs, I made small eyehooks using electrical wire through which I passed one end of the rigging to enable its tensioning.
Paints used were (all PollyScale acrylics and hand-brushed) NATO Black, 5-L Light Grey (non-black vertical surfaces, as light grey is a lot easier to paint than white), Gunship Grey, and Deck Tan (for decks and halyards; deck crevices were runover with a pencil to try to give it some depth, but is not very obvious, especially in direct lighting).
The model took approximately 5-6 months from start to finish.
