by George A Georgopoulos
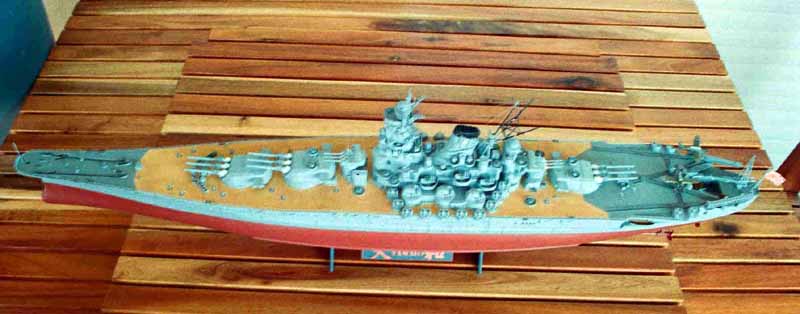
1/350 IJN Yamato (Tamiya)
I know, I know: Here is YAY (Yet another Yamato).
However, this is one of my older builds and I hold it dear to my heart, as it marked my transition from Out-of-the box builds to using PE, weathering and scratchbuilding. In short it was my gateway to a brave new world. Here are some highlights.
The model is all handpainted. (The airbrush was bought at the very end of this build; possibly in time to do the seaplanes, but this is a bit murky in my memory.) Many, many coats of very dilute paint were applied. The deck is a flat color underneath pastel dust of various shades. This was my first application of pastels, and as it was done after the superstructure was painted and in place; you can detect the tan color of the dust at the lower levels of the superstructure.
The seaplanes were first painted silvery and on top of that the green was applied. I had so much fun seeing the silver appear as I rubbed away at the poor planes with a piece of cloth, that I overdid the weathering there, but it felt great.
Those of you familiar with the kit will also see my attempts to hide the seam where the two-part deck pieces meet just ahead of the main superstructure tower. I had just read Mike Ashleys books and this was my attempt to apply his methods.
The dedicated WEM PE was used, but the more delicate parts were too much for me at the time, so they were not applied. (Thanks to this site however, they were exchanged for other goodies!)
You can also see that the PE parts for the radar on the top rangefinder are just glued to the kit-supplied parts they were meant to replace; another bit I could not handle properly at the time!
The WEM PE comes with 28 triangular brace supports for the overhangs of the quarterdeck (above the area where the boats are hanging in the pictures). It took me a few sessions to put them in place and was basking in my glory, when I dropped the hull, and it impacted, stern first on the floor. Now, as a remnant of my younger toying days, I had the habit of adding ballast in the form of reinforced concrete (the role of the steel rods undertaken by paper clips) so that my models would float properly. Since, as we were told in high school, F = m * g and the m part got quite big due to the ballast, the force of impact was more than the poor hull could take. The stern plastic split up and the 28 little triangular projectiles achieved remarkable velocities and were mangled to an unbelievable degree. The ones that stuck into my legs were immediately recovered, the ones that ruined the curtain were rather unfortunately recovered by my wife. In any case, though I fixed up the stern damage, I did not have the heart to attempt the PE supports again.
One of the pictures attempts to give you a closer look at the cable reels in front of turret A. They were made with the method outined in this forum topic (http://www.shipmodels.info/mws_forum/viewtopic.php?f=4&t=260).
You may laugh at this, (I do so now) but at the time it was a very costly mistake I had just finished the front superstructure tower, (outside PE staircase and all), had applied the stretched sprue rigging and was trying to get it stretched straight. I head read that heat does the trick so I reached for the closest source of heat near my bench at the time which turned out to be the incandescent light bulb of my desk lamp. So I held the structure close to the lamp, the back side of the tower facing the lamp.And sure enough I saw the reaction on the rigging. But I held it close to the lamp a bit longer still. And of course I started smelling something foul and caught the smoke as it was coming out of the lamp cover. I had held the thing too close for too long and managed to burn a hole of roughly elliptical shape on the back side ot the tower about 2cm by 1cm in size. Right where the PE ladder was sitting. The poor ladder had done its best to conform to its new surroundings, but it did not look pretty. I wish that someone could have taken a picture of my face at the time, but there were no witnesses. Anyway, the smartest thing I did among all this stupidity was to leave the thing alone until it cooled off, as handling the soft backside of the tower would have resulted in more chaos. I scraped up the courage to correct the damage, and am rather proud that it does not really show any more. I can now say that I did that tower one and a half times! Since then I have switched to the more benevolent incense sticks for straightening the stretched sprue.
Thankfully, as far as accidents go, my builds are rather dull since this one!
