Keith Bender
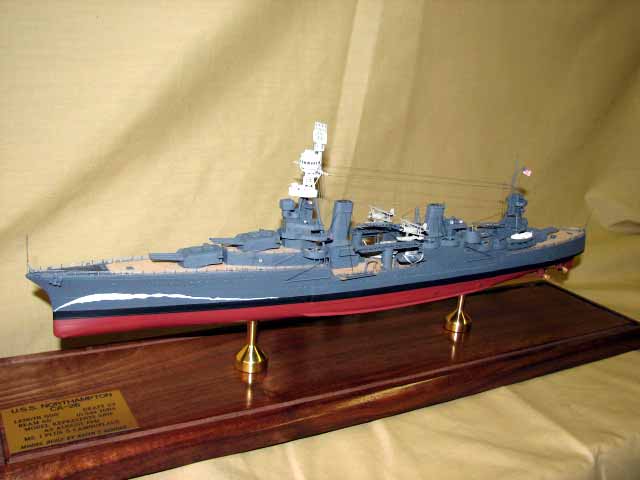
1/350 USS Northampton CA-26 (BWN)
This is a BWN kit I pulled out of my archives of golden oldies and put it under the knife. I started it Sept 18, 2006 and just put her in the case last week. The first thing I did was hog out the port hanger. This was done by Dremel going up though the bottom of the upper hull. I had to be very careful not to go through the overhead of the hanger on this one. The hanger will be finished later. There was a lot to do to this hull before I could even start building. I had to cut the bow off the lower half just forward of the bilge keels so it could be lined up with the stem. It had a 3/16" offset to the port side. When this was glued in place I filled the rather large seam with new resin. As I been doing for some time now I plating the hull with the tape and paint method, but before this could be done I had to reshape some things.
The stern was too deep; in the way of the props would hang down below the keel and the shaft exits were also too low. This meant I had to sand down the lower stern around both sides of the skeg. The stern also was too round, whereas on the real vessels they were a little more flat in this area. Keep in mind that on most ships larger then a destroyer the props do not hang lower then the keel of the ship. This does require some careful work but it pays off when the model is complete if your a full hull nut like myself.
The bow needed some attention as well at the bilge and stem. The stem on this ship was very sharp so it needed to be sanded to a fine edge. The turn of the bilge on both sides was too square and had to be made more round. With the hull mods all complete I started the shellplating with layers of paint. The last thing to plate was the side strengthening plates that are mid ship area. This was built up with six coats of paint. Next came the stiffeners and seachest plates. These were made from .005 plastic sheet. The shafts were all scratchbuilt and placed on the hull with the rudder. It was then primered twice overall.
I went back to the hanger and completed it with .015 plastic sheet on the deck, bulkheads and overhead. I glued four extra wing sections on the bulkheads even though they are very difficult to see in there; however they are there for those who can get an eyeball in to look. I replaced the metal planes with WEM resin ones to keep the weight off the cats. All masts and yards are brass soldered together. The stacks are hogged out as well like the hanger. I can't stand to see a stack that is only 1/16" deep, where does the smoke come from ? The individual boiler uptakes were formed with plastic sheet and the top braces are brass wire. There was a lot of other little things done on this model but I will keep it short.
I wanted to paint it in MS 1 +5 so I used Testors Model Master gunship gray and added navy blue and white to it. The bow wave is hand painted. Bow wave note : There are plenty of photos of Northampton with the bow wave so I suggest looking for them if you wish to paint it correctly. Both port and stb. sides are available and they are different to one another. The wave begins back aft of #2 turret and not like the box art shows it.
In all this was a fun kit to build and do some mods on. I highly recommend it to anyone who has built resin ships.
