by Momcil Kaltchev
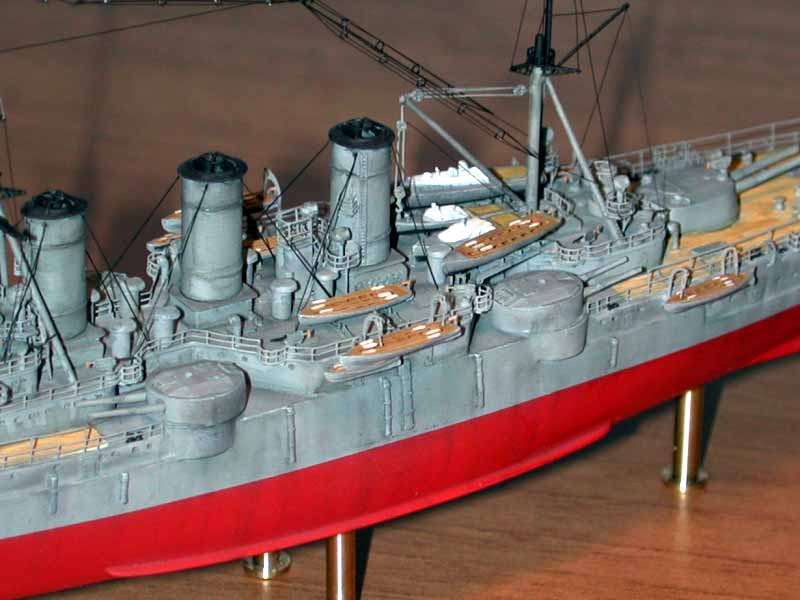
1/700 Georgios Averoff (YS Masterpieces)
When I purchased the kit my first impression was of owning something very special and rare: great and crisp detail, excellent casting, good engineering and clear instructions. The photoetched parts further improve the quality of the kit adding detail in almost every corner of the ship.
The building process was a great deal with perseverance and patience. The kit has been assembled out of the box, but not in the usual meaning of this expression. Indeed you have all the parts already at your disposal and really do not feel the need to add something more. The real challenge is to put it all together. The final result is really outstanding. The only thing I would like to mention is an improvement of the QF guns. I was not satisfied with the shape of the barrels because they were too flat. So I cut them off and used the main body of the guns, a small photoetched element that was bent and thicken with a small piece of plastic strip from evergreen. In the upper part of the element I performed a small hole with a needle and added a brass wire (0.4 mm diameter) giving thus a more realistic shape to the gun barrel.
I painted the main two colours of the ship with Vallejo acrylics using an airbrush and the deck with the proper enamel colour with a very small brush by hand. The weathering was achieved with some washes, chalks and dry brush. My general approach to this process was to use as fey colours as possible: a lighter and a darker shade for each of the three main colours of the ship and the black powder for the most weathered areas. On the other hand I tried to give a more varied palette enhancing or reducing the weathering application.
The rigging was made with the usual filament gained from a black sprue. Sometimes it is difficult to find such black sprue but the modern car kits can be useful because they sometimes use the black colour for the interior parts. A very delicate step were the six central antennas. Each of them is made of four filaments reinforced with several circular rings. I used a very thin photoetched ladder and cut it into several single rectangles. I forced each rectangle on a needle giving thus a regular circular shape. Moreover the edges of each rectangle formed four very small tips that I used later on as a reference point for gluing the filaments. This final stage was achieved by holding the rings with a adhesive tape in position on a wooden tablet.
This kit is affectionately dedicated to my grandfather.
UPDATED: I am updating the picture gallery with these images which have a colour reproduction closer to reality than the previous and were made with a professional camera. I decided also to replace the brass columns used to display the model with a wooden base that I have fully built from scratch. The base is of course out of scale, compared to the model, but for my opinion more suitable and was inspired by the period dockyards
