by David Griffith
The Hunting Party (Various)
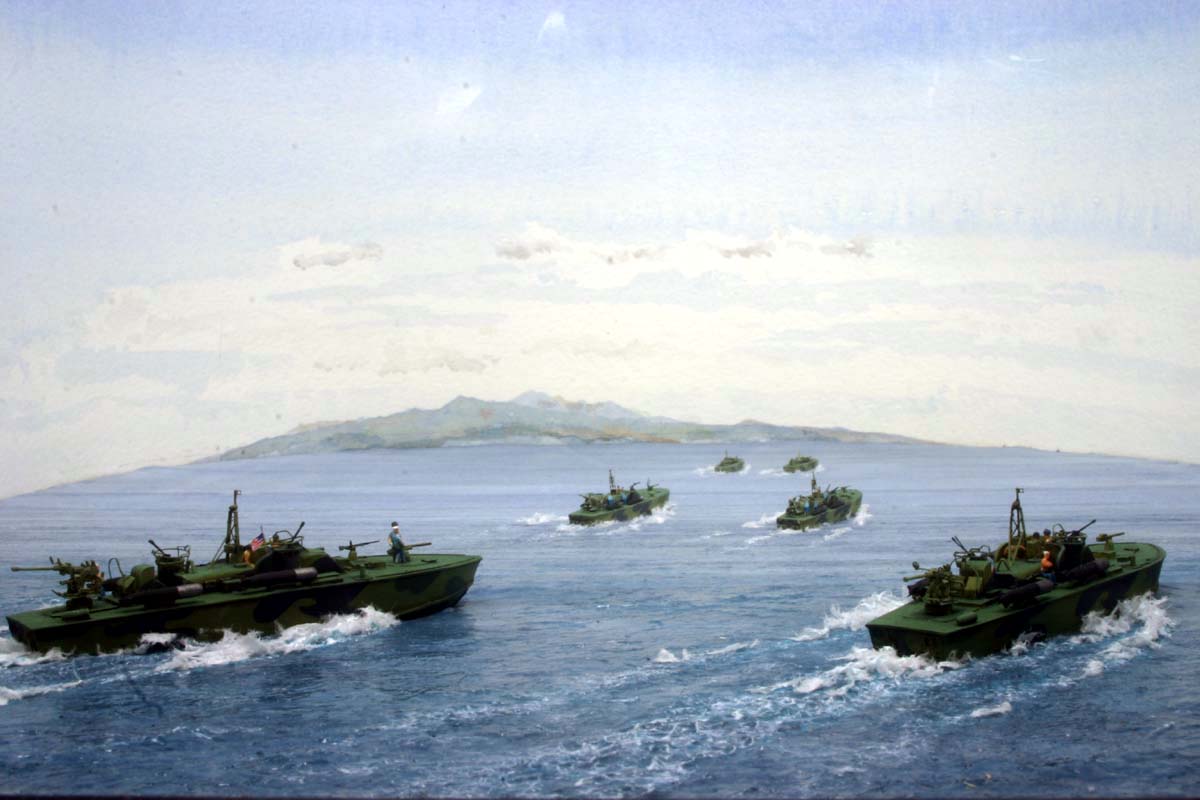
This is a forced perspective diorama, using various techniques, not just models of various scales, to give the impression of distance.
Models of three different scales are used, 1/350, 1/700 and 1/1400.
Viewed from a comfortable distance of 45cm, the closest models, in 1/350 scale, appear to be 157m away. [ 0.45 x 350 = 157 ]
At the same time, the models furthest away, which are 1/1400 scale and positioned 20cm behind the nearest ones, and therefore 65cm from the viewers eye, will appear to be 910m away. [ 0.65 x 1400 = 910 ] The apparent distance between the front and back models is therefore 753m. [910 157 = 753]
If these smallest models were the same scale as the front ones, they would appear to be only 227m distant. [ 0.65 x 350 = 227 ] They would then appear to be only 70m further away than the front models.
It can now be appreciated that the difference in scales has increased the apparent distance between the front and back ranks of models by a factor of more than 10.
However, this trick is only able to work because the observer is required to view the models from a particular angle.
The viewing angle for the diorama is deliberately restricted. To be properly appreciated, it must be looked at only through the front window. This reduces the effect of parallax. This is the apparent movement that happens between close and distant objects when the viewer changes position. The more you were able to view the model from either side or above the horizontal, the more the effect of distance would be lost. You would soon realise that the individual boats were actually close together and that they were different scales.
In addition, if you viewed the diorama from the back, the impression would be of men on the larger scale boats playing with radio-controlled models. Of course, there is nothing actually wrong with that, we are all modelmakers here today. But I think that most Pacific veterans would take exception to the suggestion that this was the way they spent their war!
The models at the front are painted in colours that are full strength. The smaller models have increasing proportions of pale grey added to the mixture, to lighten and desaturate the colour. This mimics the effect of atmospheric perspective, the phenomenon of distant objects appearing lighter and bluer than close ones, due to the effect of moisture in the atmosphere.
Electric lighting using LEDs is used to supplement the ambient light that comes thorough the lid, and which would be insufficient on its own. This extra lighting is concentrated on the front models. The inverse square law says, basically, that the amount of light arriving at the viewers eye is in inverse proportion to the square of the distance of the object from the eye. The greater the amount of light that is directed at the closer models, the greater is the amount that is reflected to the eye, and the closer they will appear relative to the distant models. Similarly, the smaller models appear even further away because they are less brightly illuminated.
The wiring of the LEDs required careful planning. There are 15 LEDs in all, in 5 sets of 3. Each set of 3 is wired in series with a 75ohm resistor, to restrict the current to approx 25 milliamps. The 5 sets are then wired in parallel with a 12V battery as the power source.
The models used in the diorama are resin and by White Ensign in both 1/350 and 1/700. The originals represent PT 109, but are converted to a later war configuration, so I could have a much heavier armament fit. The shapes of the superstructure were changed, and the postion of the forward machine gun tub moved a couple of millimetres aft. Niko 40mm guns were added and 20mm guns by Master on the 1/350 models. The camouflage pattern was painted only on the starboard sides of the boats, because they intended to be viewed only from that side. After all, if you were lucky enough to be able to turn the Mona Lisa around, you would expect to see a plain board, not a painting of the back of her head!
The sea base is painted on watercolour paper using artists watercolour paints. The colour is graduated from a dark blue/grey in the foreground to a pale blue/grey towards the horizon, in order to mimic the appearance that you normally see.
The background is again formed from watercolour paper and again painted using artists paints. The sky is a graduated wash, although not a good one; Im not in any way a competent artist in this medium! The background is curved around the diorama.
I put a transparent polystyrene lid on the top of the diorama, in order to let ambient light in. The combination of this with the LEDs is sufficient to illuminate the scene, although not enough for photography. I used by photographic lights for this photoset.
When I first showed this diorama, in a not-entirely-finished state, I found that people insisted on looking at it through the top, rather than the window. It was only the young children who got the idea naturally. So, for Telford, I applied some scumbled white paint to the lid, to obscure the view without blocking out too much light. But the men STILL tried to peer through the lid! Maybe they were armour modellers.
I hope these photos turn out well. I think this sort of diorama is very difficult to photograph well. I am sure it would benefit from the use of one of those photo-stacking programs.

© ModelWarships.com