by Peter Van Buren
1/72 Gato Rescue at Sea (Revell)
I had been on shore leave from ship models for awhile when under the Christmas tree appeared a 1/72 Revell Gato, courtesy of my family. Why the Gato I asked? Because it was a boat and the box was big so we bought it was the succinct answer, and hence I was back in the water.
Please note that I build models because I enjoy doing so. I am not one to enjoy research and so this model does not represent any specific boat. From what I did learn, elements changed constantly on these vessels, with captains adding things and various orders making changes on unpredictable war time schedules. I just built her the way I thought looked cool, so please, if you enjoy razor-edge accuracy, do not look or criticize here.
The good and bad points of the kit have been written up elsewhere. The only fit problem comes in joining the hull halves, which have a clear warp in them and required some serious muscle and some serious clamping to hold together long enough to glue. I used a heavy dose of Tenax on the seam, clamping and welding an inch or two at a time. Otherwise, I used almost no putty or gap filling.
Waterlining a hunk of plastic this size and weight required some serious fire power; you are not gonna get through this hull with a mini Dremel and live to tell the tale. I used a Black and Decker jigsaw with a small tooth blade, going very slowly to avoid melting the plastic and gumming up the blade. Do this outside, as even with Christmas cheer my spouse was unhappy with the airborne plastic particles that are still in our house. The doctor says my coughing may stop in a few months.
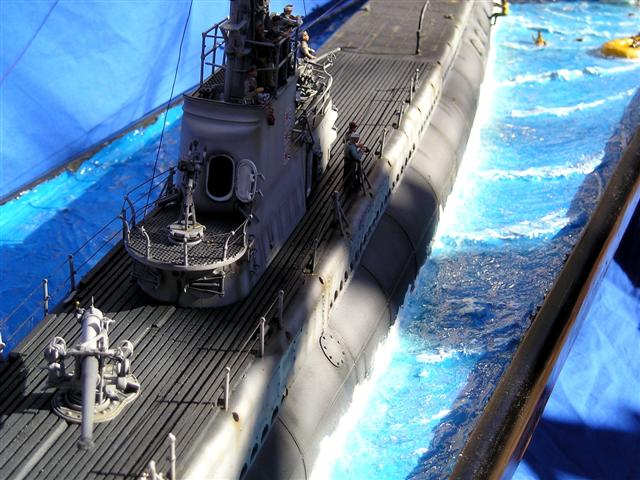
The metal parts of the deck are right from the box, with welds and bolts added. These are made from super glue, applied with a toothpick and then zapped with accelerator to freeze them with some body and dimension. The wooden portion of the deck is balsa strips, sealed and painted and laid down with contact cement. They are out of scale, but even as out of scale, look better to my eye than the kit plastic. I am interested to see what the aftermarket does with this. I extended the wooden part of the deck just ever so much at each end, neatly hiding the seams between the three giant hunks of plastic that form the deck. I gouged out the various hatches and scratch built the hatch covers from the missile tube ends from an armor kit.
The weapons are from the kit, with various bits of left-over PE added. I am interested to see what the aftermarket weapons look like, and am curious to see what the PE sets for this kit look like, having guessed myself on where some PE would help.
To make the additional runs of drain holes, I cast a resin replica of the plastic piece from the kit, and cut those cast pieces into the sides of the decking. This was also messy and not so much fun work. In looking at photos of the real boats, the scalloping (oil canning) of the panels and the weld seams on the sides of the boat seemed a prominent feature to me. I used a Dremel to grind the scalloping into the panels and added weld lines with super glue as above.
The boat was airbrushed with various Tamiya acrylic greys, no straight black, and weathered with oil paint washes for the rust and wear.
This was my first experiment with water, and I followed the advice of many here on this site on the water. I began by laying down a base of wallboard filler to create the basic shapes of the waves, molding the shapes with wet fingers. After this dried (two days), I applied a thick layer of acrylic medium to create the water. This also took several days to dry; it goes on as a thick white goop and then slowly dries clear. I then used a selection of thick acrylic tube paints to paint the colors and achieve the gradation of water hues. This was actually quite fun, as I squeezed out long ropes of thick color on a plastic palette and mixed and swirled the paint colors. The foam alongside the boat is extra thick acrylic white paint, applied with a butter knife. This took another few days to dry, after which I applied a final coat of clear acrylic medium paste for the wet look. I applied some Future in one corner as a test, and the Future turned white and would not dry, so if you are not a chemical engineer, beware.
The figures are from CMK, sold by Squadron. I repositioned some of the limbs to vary the poses. While CMK sells a life raft set, the one here is scratch built from epoxy putty. The aircraft is from Hasegawa with some Eduard PE added.
This was a fun build, and entertaining working with the water. The problem now is finding a place to display something bigger than our car. Big boxes yield big models, so I am hoping for something in 1/700 next Christmas.
Water
Misc

© ModelWarships.com