by Peter Van Buren
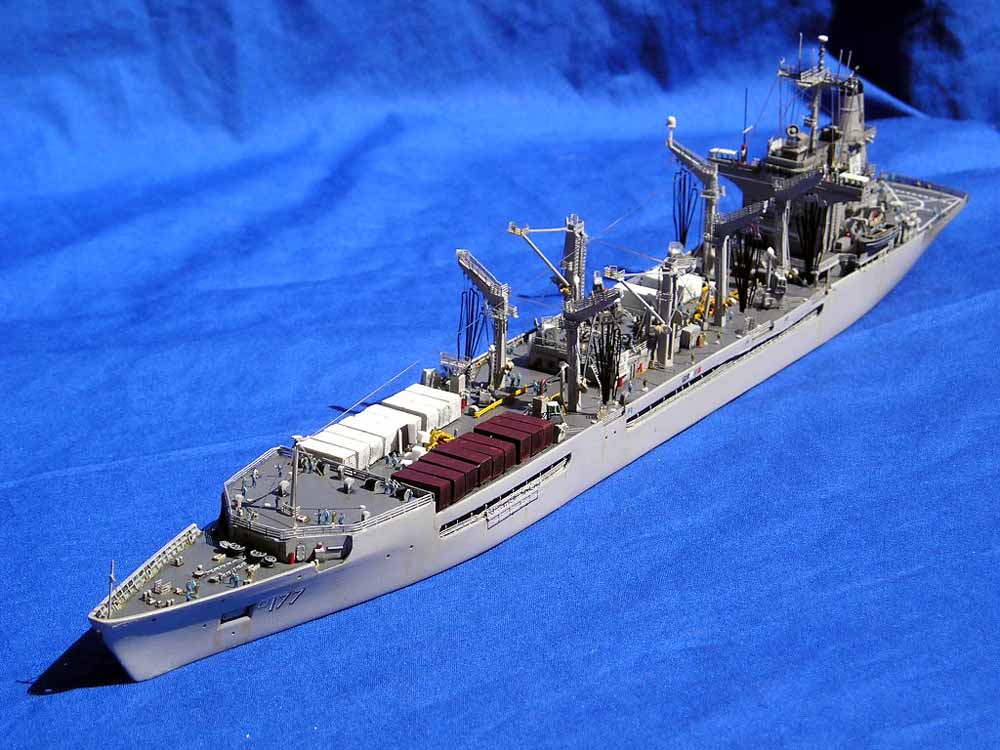
1/700 USS Cimarron AO-177 (JAG)
This was a pleasantly complex build, challenging without being frustrating. The precise engineering of the kit is what made the difference, in ways that would have been hard to predict just looking at the kit itself.
After giving the resin parts a firm wash in dish detergent to remove the mold release, I drilled out a few drainage holes on the hull. The photo CD JAG sells separately was a great help with details like this, as ships like the Cimarron are not as well documented in books or the on the web as we might like.
Early on you will encounter one of the trickier sequences in the build, placing the lower PE railings and then gluing the weather deck in place. Though the instructions warn that the railings may need adjustment, mine fit just fine. JAG has molded a very slight channel alongside the hull edge that receives the PE and helps support it and, more importantly, keeps it nice and straight. An example of great engineering, without the channel you would either have to be very very careful or more likely glue some sort of plastic strip to support the PE.
A challenge with the deck is that it creates a very light seam to fill at the stern end. The bow end very cleverly slips into a groove cut into the hull (engineering again) that effectively hides any seam, but a little work is needed at the other end. The job is less troublesome than you would think, as much of that area will ultimately be covered with deck gear. I removed and later replaced two pieces molded proud of the deck near the seam to make sanding easier.
Lastly for this phase, add the helo deck. The molding is very nice here, with tie-downs in scale, and the seam is 95% hidden under the superstructure overhang. The casting on the stern under the helo deck is quite delicate so be gentle when pressing down to seal the glue bond.
With major construction thus completed, I primed with Mr. Surfacer White, available from Squadron mail order and others. I have come to like this primer for resin, as it dries to a glass-like finish and fills nicely any micro-roughness on the resin surface. I will caution that it is much thicker than the Mr. Surfacer Gray and thus unsuitable for PE. The darn stuff also takes a while to dry, in this case two full days before I could work with the pieces. The stuff stinks, so work outside of the Green Zone at home with this. Apply in several light coats. With two or three coats it is opaque and represents a potential solution to the constant quest for painting large areas white. Just for the record, having lived in Japan a number of years and speaking some Japanese, I still have no idea why the Gunze company calls all of its innovative products by such stupid names. There is no equivalent in Japanese, no toilet cleaner named Mr. Toilet Cleaner or even Toilet Cleaner-san. Still, I use Mr. Mark Softener and Mr. Airbrush Bottle. I am also unsure why no feminine versions exist, such as Ms. Brush Cleaner.
As the hull dried, I turned to the superstructure. The mast built up as a sub module without trouble. Go slowly and keep a finger on the tiny PE parts as you cut them off the sprue to avoid anything springing off. I added a few extra antennas using paint brush bristles.
The superstructure itself is mostly cast in one piece. You need to add the bridge wings, plus their front bulkheads plus the covered extensions, a PE part. This does create a three-way seam on the front of the bridge that just needs a little careful sanding. The side platforms come right off their sprues (no flat sanding needed). There are a lot of PE stairs/ladders to add but everything fits. Note that there are eight different sizes of ladders in the PE set, each for a very specific location, so check the instructions carefully. Put the right ladders where JAG tells you to an their precise engineering assures a perfect fit.
I used cut up pieces of 1/700 railings for the windshield wipers, and added railings and the break-away signage prominent on the real ships. The lettering on the signs is random decal stenciling from an airplane kit.
I next separated the deck gear and mounted each piece on cardboard with rolled masking tape for painting and detailing. This allows me to work on the small parts without having to handle them. Once everything was dry, I closely followed JAGs instructions to glue everything in place; they make it easy with laser-etched outlines on the deck showing the location for each item (the outlines are covered by the part and invisible on the finished model). The forklifts come with their own sweet PE and are included in the kit, as are the Conex containers. I opened one up with plastic card doors and added the figures, cargo and decals. The idea was to get everything I could in place before building and placing the delicate boom arms and hose rigging.
JAGs instructions refer to these as a kit-within-a-kit, and there is some truth to that. I suggest assembling and painting each stanchion/arm separate from the hull. This gives you 360 access to the part and allows you to build each as a sub assembly, say while your Mr. Surfacer spends a couple of days drying without Ms. Hot Air Radiant Heat Device to assist. Read this twice please: there are a lot of parts to each arm there are a lot of parts to each arm. Now read this twice: do not panic just go slow do not panic just go slow.
At first glance the instructions appear complex, as you put together a set of resin and PE parts on each arm. Each arm is slightly unique, so no cheating. However, by going slow and breaking it down, I had no real difficulties. I recommend adding the sturdier resin parts first, and finishing with the PE for ease of assembly. The railings atop each post are best folded in place for a perfect fit. I glued the longest edge down, let that dry, and then bent the railing around the edge of the post. Use two pairs of tweezers, one to hold the glued portion of the rail and the other to make the bends. The whole set of seven arms only took me a couple of beers, um, I mean a couple of hours. The fuel hoses that hang from each arm are gorgeous, with amazing details of lines and block and tackle. Separate them carefully from the sprue and stand back and admire the detail etched in.
I had stopped working in 1/700 a year or so ago, frustrated by the lack of detail and difficulty in working with smaller parts. The Cimarron kit restored my faith in the little guys, at least when working with a quality kit that cooperates, not frustrates, the builder. I was able to get enough detail into the finished ship at about the right cost in time for me to say this was a project I thoroughly enjoyed working on. Each evening Id sit down and add a few things, enjoying the process of building up to the finished product. The JAG Cimarron is a worthy, challenging project for anyone interested in modern ships with some patience and a little experience in multimedia kits.
The USS Cimarron web site at http://www.usscimarron.com/ has some photos of the ship, as well as an almost obscene video of refueling at sea. Many of the photos on the web site are available in the larger sizes and higher resolution needed by detailers on the JAG Cimarron photo CD.
