1/700 Cable Lay vessel Living Stone (scratchbuilt)
|
by Roel Van de Velde |
1/700 Cable Lay vessel Living Stone (scratchbuilt)
This is my scratchbuilt model of the Dual-fuel (LNG and MDO) Cable Lay vessel Living Stone.The vessel was ordered by Tideway (part of DEME, one of the largest dredging companies in the world) as a Multi-purpose vessel. This was, at that time, somewhat a fashion among dredging companies in order to broaden their horizons and venture into offshore construction.
She could be outfitted as either a Fallpipe vessel (laying stones/rocks in precise locations on the seabed to cover subseapipelines/cables or foundations at large depths) or as a Cable-lay vessel. Eventually it was decided to finish her as a cable-lay vessel with a rather large and complex dual-lane cable lay system that allows her to handle multiple cables at one time.
Both of these functions require a strong Dynamic Positioning (DP) system. Living Stone is a DP level 3 vessel meaning she can keep her position when any of her systems would fail, including cables, switchboards, thrusters, position indication systems (GPS etc.) or even the navigation bridge.
Due to her modular spacing she can either carry 1 or 2 Remotely Operated Vehicles (ROVs) to assist in the subsea operations.
Additionally her large design also allows her to carry a tracked subsea vehicle called a trencher, which can bury the cables below the seabed in a variety of bottom types. This is only performed after laying a cable and occasionally this job is outsourced so Living Stone can perform her primary job of laying the cables themselves.
She had a turbulent start, being built at a Spanish shipyard which went bankrupt during her construction. Due to failing deadlines and obligations from the shipyard, the owner even tried to highjack the partially finished vessel.
After final bankruptcy from the yard, she was then transferred in partially finished state to another Spanish Shipyard to be finished under the management of the owner himself. During that period, she caught fire in the engine room. Eventually she was towed to the Netherlands for final fitting out. The final construction phase also involved many structural changes as the emphasis of the initial construction was a Fallpipe vessel, while in the later phase it was decided to go for Cable-lay vessel. This meant a lot of equipment was removed again and other equipment, including the helicopter landing platform, to be installed.
After trials however she has proven her technological advantages in various projects in the harsh environment of the North Sea.
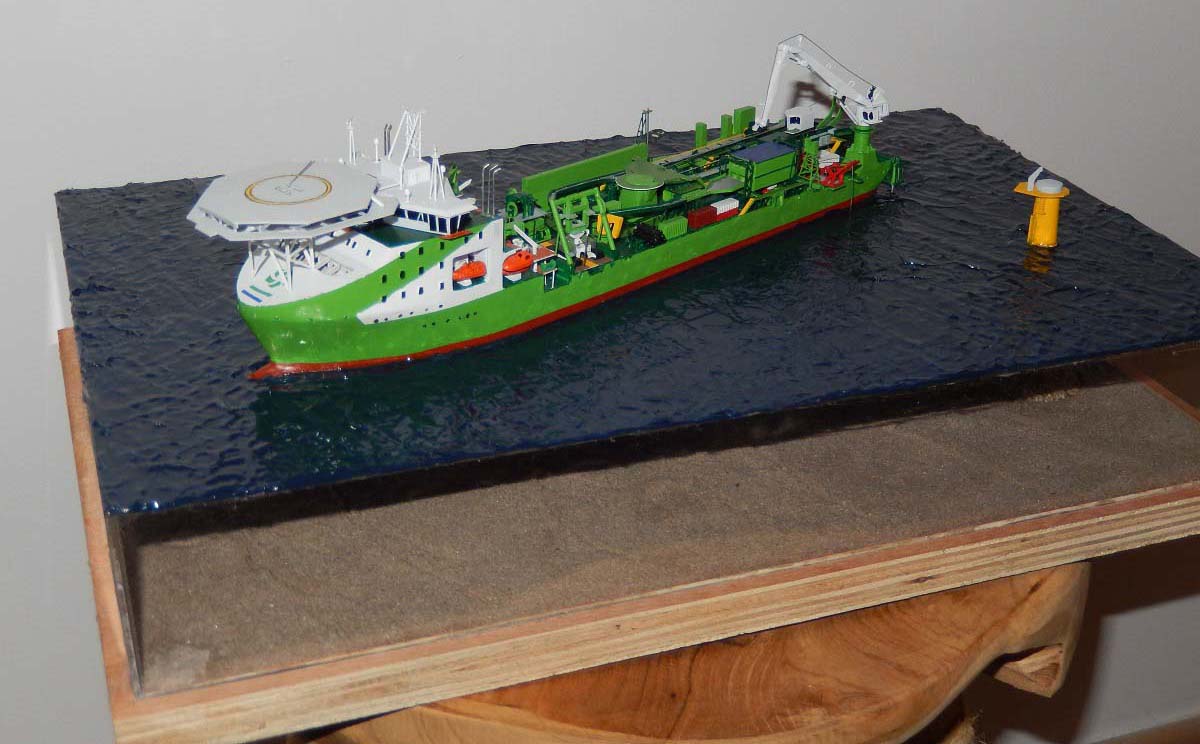
The diorama represents the final installation of a cable between two windmills. The first part is fixed on a windmill base, then the cable is layed along its intended path and the last end is then pulled in the next windmill base. This last action is what is displayed here. The ROV is deployed to monitor the cable, while the ship is kept perfectly in position with a fixed heading.
The model is built in my normal way of a styrene skeleton with two-component epoxy putty for the curved parts. The model was built from the outset in 2 pieces, the lower and upper hull with 1mm missing in between as an allowance for the waterline (clear polyester sheet). This way the hull acts as a long stiffener for the sandwiched polyester sheet. This allows for a thin sheet. In order to match the hull parts, I initially did make a styrene waterline plane to have a complete hull. Afterwards this spacer was removed to make place for the clear polyester water plane.
Additionally the subsea part of the windmill base acts as a support for the sheet, which together with the clear polyester sides makes for a perfectly straight water plane.
Although I intended a rather brownish North Sea base, I decided to go for a rather dark blue since that is the colour that is often seen on pictures from the sky. Unfortunately I did lose quite some translucency by doing this. Luckily some translucence is left and some light protrudes through the sea base to the underwater part of the diorama. As a final top finish it was covered in clear acrylic gel to create a more realistic base. This was done in 2 layers as I was not satisfied with the first layer.
The clear polyester sheets known as Vivak, were quite difficult to manipulate as they are made for vacu forming or heat manipulation and not really for cutting and gluing. After some research and testing I found that it can be strongly bonded using Methyl Ethyl Ketone (MEK). Cutting is however not easy and cutting and then breaking along the edge often fails and ends in cracking the sheet. I eventually settled for scoring with a blade and carefully cutting along that line with a power tool.
